直接用,用户授权
快速使用
1.在views.py中写三个视图类,分别为LoginView,UserView,OrderView(下方第三个代码块),在urls.py中做好路由与视图类的映射,代码如下:
from django.urls import path
from auth import views

urlpatterns = [
    # path('admin/', admin.site.urls),
    path('user/', views.UserView.as_view(), name='user'),
    path('login/', views.LoginView.as_view(), name='user'),
    path('order/', views.OrderView.as_view(), name='user'),
]
2.在应用目录下创建authentication.py文件,在此文件中编写认证类(不能在views.py文件中编写认证组件,否则会出现循环引用,报错),实现一个简单的认证逻辑,若url请求参数中携带token,则认证成功,在request.user,request.auth中设置返回值,若未携带token,则返回错误信息,例如:
from rest_framework.authentication import BaseAuthentication
from rest_framework.exceptions import AuthenticationFailed


class MyAuthentication(BaseAuthentication):
    def authenticate(self, request):
        # 获取用户认证
        # 1.读取请求传递的token
        # 2.校验合法性
        # 3.返回值
        # 3.1返回元组(11,22)  认证成功   request.user  request.auth
        # 3.2抛出异常  认证失败(返回错误信息)
        # 3.3返回None  多个认证类(类1,类2,类3)若这些认证类都没有成功和异常
        token = request.query_params.get('token')
        if token:
            return ("xiao", token)
        raise AuthenticationFailed({"code": 200, "error": "认证失败"})
3.在视图类下应用,authentication_classes = [MyAuthentication],在authentication_classes列表中添加了MyAuthentication认证类的视图,需要过视图类方法中的认证逻辑,没有添加authentication_classes = [MyAuthentication],列表为空的视图类不需过认证逻辑直接执行视图类下面对应的方法函数。代码如下:
from rest_framework.response import Response
from rest_framework.views import APIView
from .authentication import MyAuthentication


# Create your views here.
class LoginView(APIView):
    authentication_classes = []

    def get(self, request):
        return Response("LoginView")


class UserView(APIView):
    authentication_classes = [MyAuthentication]

    def get(self, request):
        print(request.user, request.auth)
        return Response("UserView")


class OrderView(APIView):
    def get(self, request):
        return Response("OrderView")
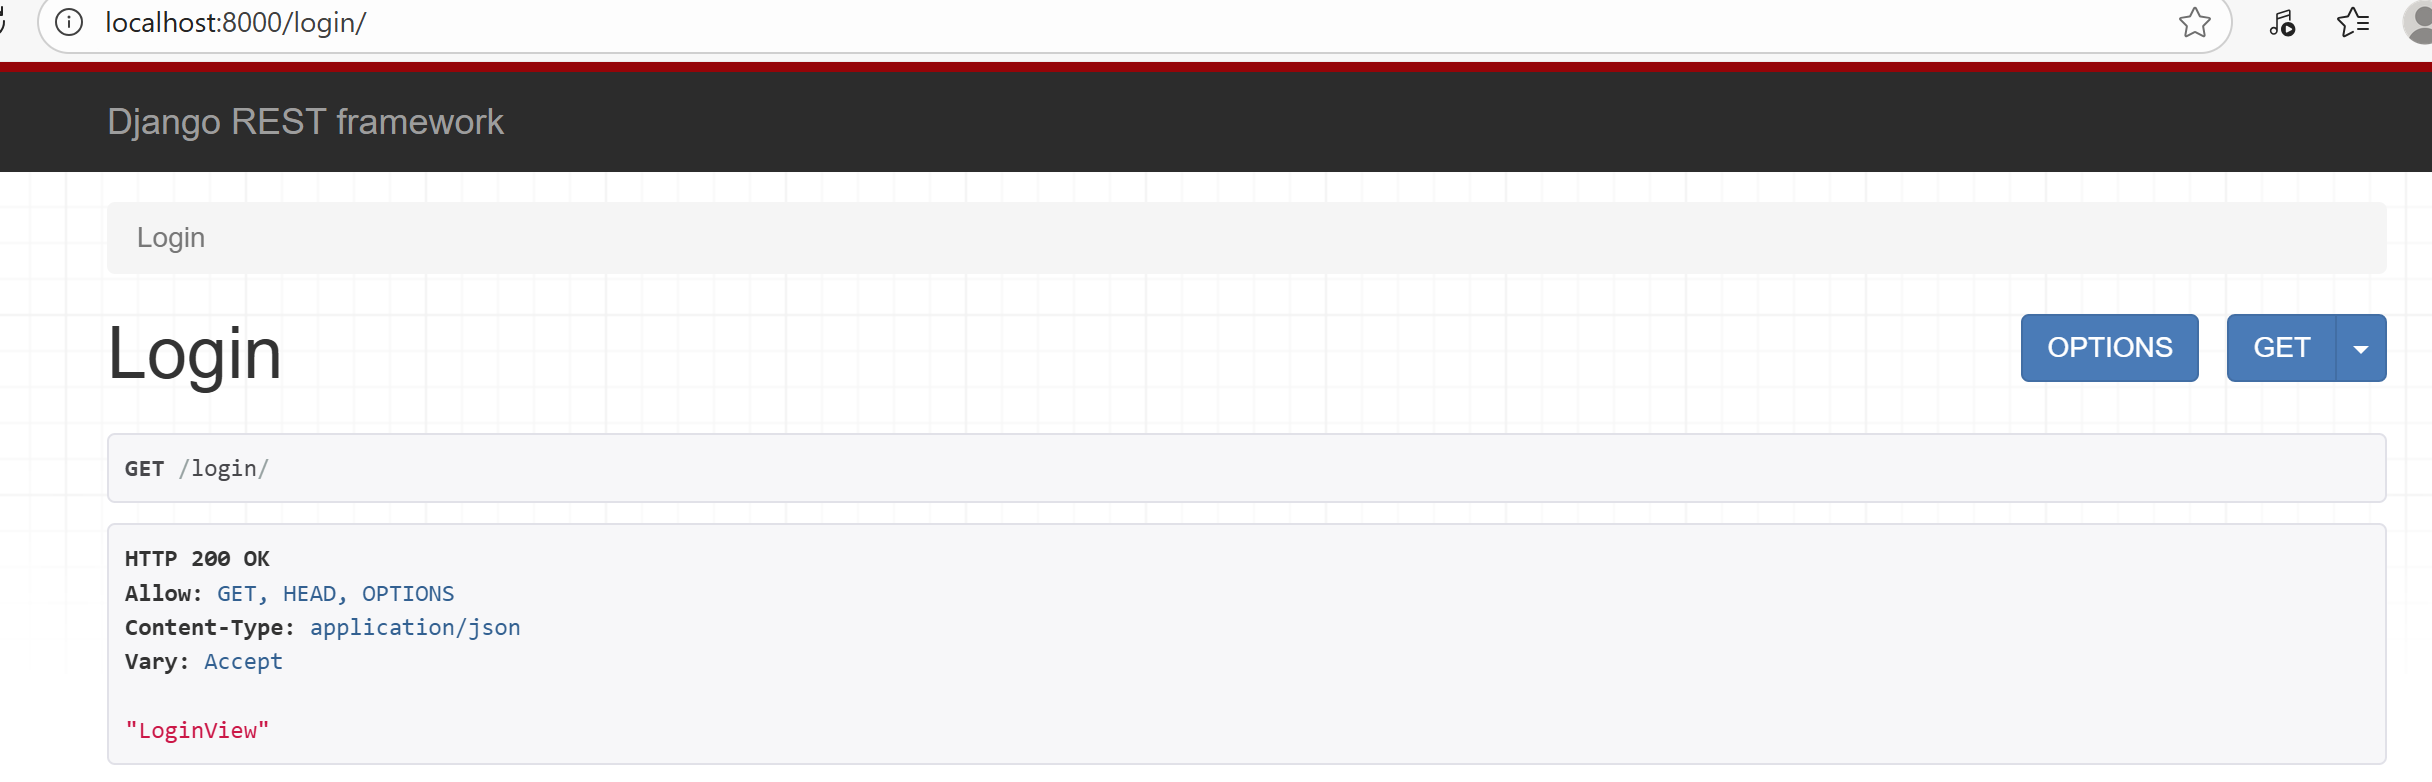
4.浏览器访问结果(访问LoginView):
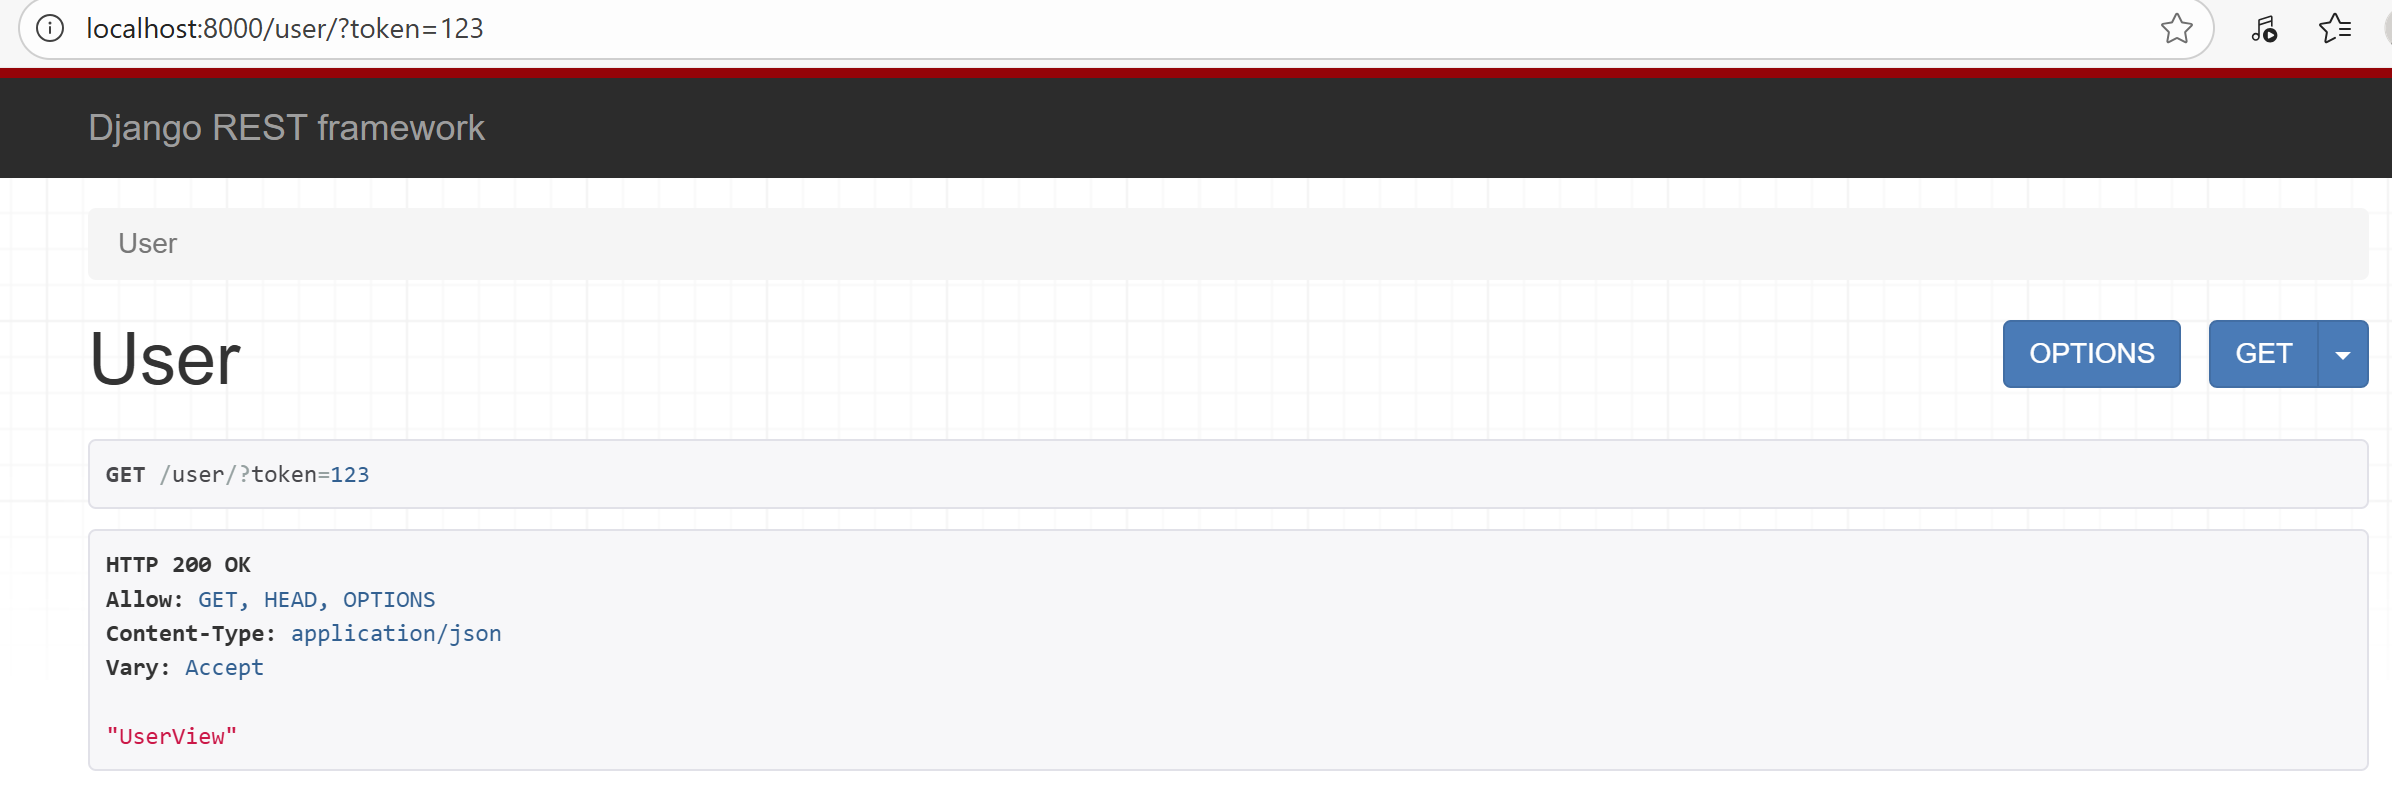
UserView带token访问结果:
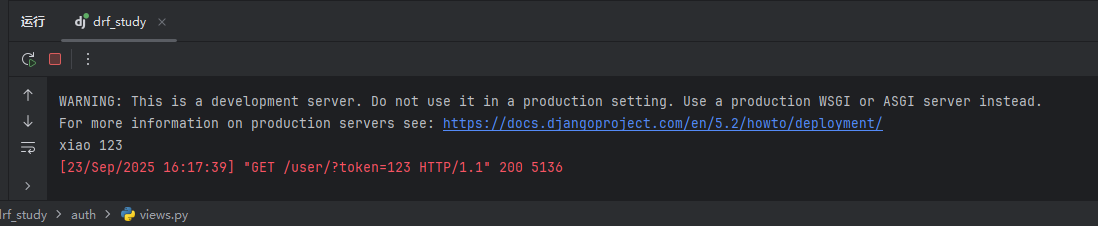
request.user,request.auth打印结果:
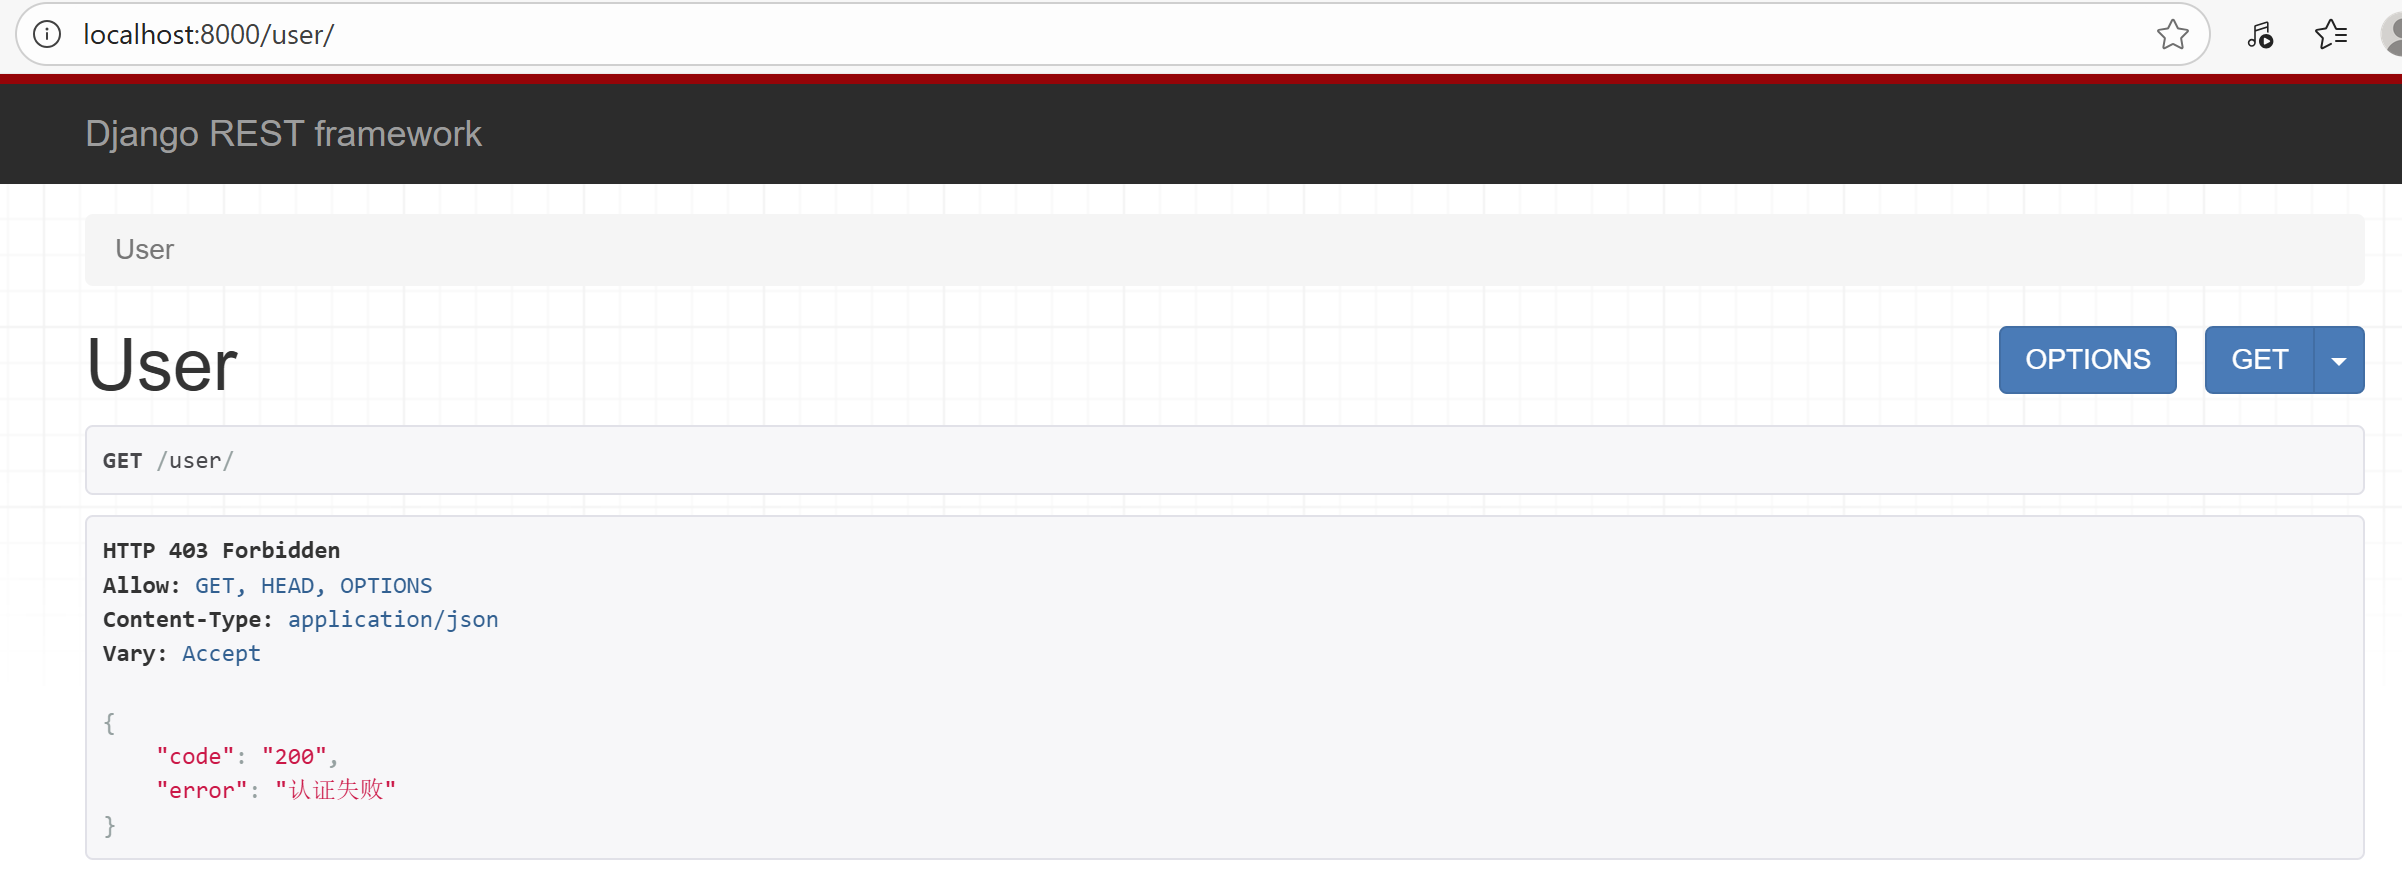
UserView不带token访问结果:
若需要做认证的视图类非常多,在每个视图类中配置认证组件便十分的繁琐,这时我们可以在配置文件中做一下全局配置,做完全局配置后,视图类中则默认应用全局类,若想更改,则在视图类下配置其他认证组件即可,优先使用视图类下的认证组件。配置代码如下:
REST_FRAMEWORK = {
    "DEFAULT_AUTHENTICATION_CLASSES": ["auth.authentication.MyAuthentication"],
}
面向对象——继承
若视图类下写了authentication_classes = [xxx,],则按照视图类下的认证类进行认证,若视图类下没有,则按照settings.py中的全局认证配置中认证组件进行认证。
理解下面代码,obj.f1()执行,打印的是Foo.f2。:
class Base(object):
    def f1(self):
        self.f2()

    def f2(self):
        print('Base.f2')


class Foo(Base):
    def f2(self):
        print('Foo.f2')


obj = Foo()
obj.f1()
class APIView(object):
    authentication_classes = 读取配置文件中的列表

    def dispatch(self):
        self.authentication_classes


class UserView(APIView):
    # authentication_classes = [xxx,]


obj = UserView()
obj.dispatch()
状态码一致问题
在认证类中添加authenticate_header方法:
from rest_framework.authentication import BaseAuthentication
from rest_framework.exceptions import AuthenticationFailed


class MyAuthentication(BaseAuthentication):
    def authenticate(self, request):
        # 获取用户认证
        # 1.读取请求传递的token
        # 2.校验合法性
        # 3.返回值
        # 3.1返回元组(11,22)  认证成功   request.user  request.auth
        # 3.2抛出异常  认证失败(返回错误信息)
        # 3.3返回None  多个认证类(类1,类2,类3)若这些认证类都没有成功和异常
        token = request.query_params.get('token')
        if token:
            return ("xiao", token)
        raise AuthenticationFailed({"code": 200, "error": "认证失败"})

    def authenticate_header(self, request):
        return "API"
用户认证和登录
我们来定义一个简单的用户模型,token值暂时存储在mysql数据(实际开发中有很多存储方式),在models.py中:
from django.db import models


class UserInfo(models.Model):
    username = models.CharField(verbose_name="用户名", max_length=32)
    password = models.CharField(verbose_name="密码", max_length=32)
    # 临时方式
    token = models.CharField(verbose_name="Token", max_length=64, null=True, blank=True)
登录视图类修改(登陆视图类不需进行认证,认证类列表设置为空),(这里为了测试方便,可以先在数据库中手动创建两个用户,设置其用户名,密码)当数据库数据校验成功后,使用uuid获取一个token值,将用户的token字段值设置为获取的token,保存并返回json响应。
class LoginView(APIView):
    authentication_classes = []

    def post(self, request):
        # 1.接收用户POST提交的用户名和密码
        # print(request.data)
        username = request.data.get("username")
        pwd = request.data.get("password")
        # 2.数据库校验
        user_obj = models.UserInfo.objects.filter(username=username, password=pwd).first()
        if not user_obj:
            return Response({"code": 10001, "error": "用户名或密码错误"})
        else:
            token = str(uuid.uuid4())
            user_obj.token = token
            user_obj.save()
            return Response({"status": True, "data": token})
我们来写三个认证类,分别对应请求url中携带的token,请求头中携带的token和前两种认证都返回None时,第三个直接返回错误信息的认证类,如下:
from rest_framework.authentication import BaseAuthentication
from rest_framework.exceptions import AuthenticationFailed
from myauth import models

# 请求url中携带token的认证类,若未携带token,返回None,进入下一个认证类,若携带token,根据token值取用户对象,若取到,返回元组值,若取不到(token错误),返回None
class QueryParamsAuthentication(BaseAuthentication):
    def authenticate(self, request):
        token = request.query_params.get('token')
        if not token:
            return None
        else:
            user_obj = models.UserInfo.objects.filter(token=token).first()
            if user_obj:
                return user_obj, token
            else:
                return None

    def authenticate_header(self, request):
        return "API"

# 请求头中携带token的认证类
class HeaderAuthentication(BaseAuthentication):
    def authenticate(self, request):
        token = request.META.get('HTTP_AUTHORIZATION')
        if not token:
            return None
        else:
            user_obj = models.UserInfo.objects.filter(token=token).first()
            if user_obj:
                return user_obj, token
            else:
                return None

    def authenticate_header(self, request):
        return "API"

# 若前两个认证类返回None,则抛出错误
class NoAuthentication(BaseAuthentication):
    def authenticate(self, request):
        raise AuthenticationFailed({"status": False, 'error': "认证失败"})

    def authenticate_header(self, request):
        return "API"
在settings.py中的全局认证配置中做如下修改:
REST_FRAMEWORK = {
    "DEFAULT_AUTHENTICATION_CLASSES": [
        "myauth.authentication.QueryParamsAuthentication",
        "myauth.authentication.HeaderAuthentication",
        "myauth.authentication.NoAuthentication",
    ],
}
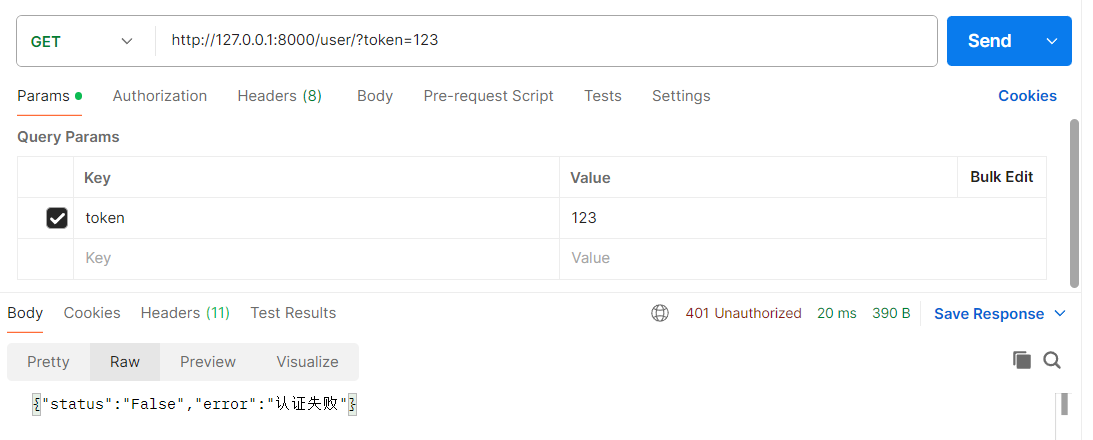
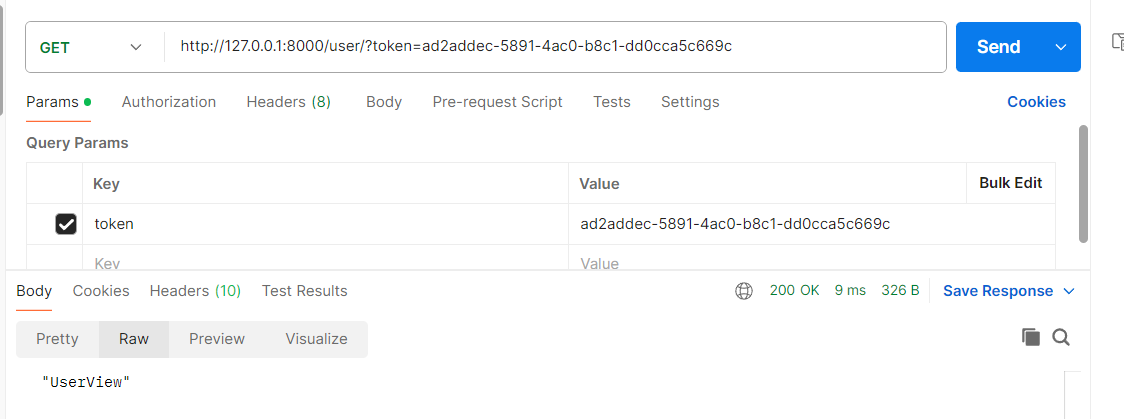
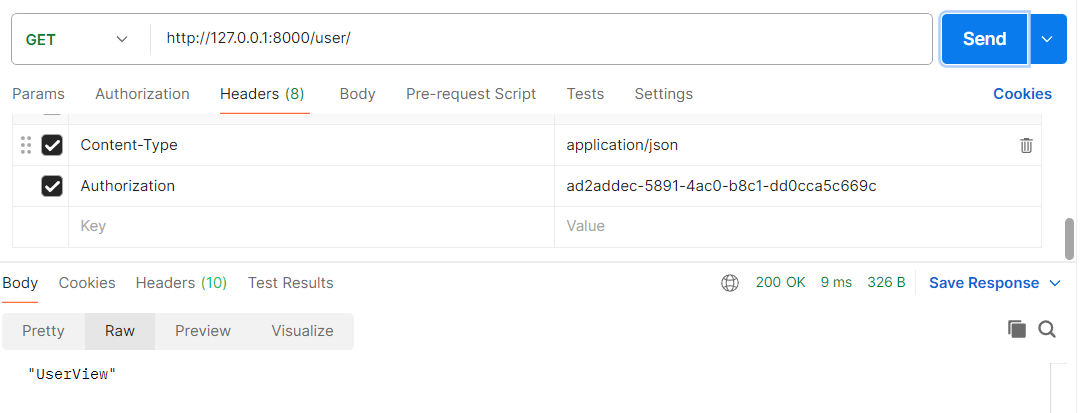
启动项目使用postman进行测试:
url中token携带错误:
url中token携带正确:
请求头(Headers中Authorization值)中携带token:
评论区 0